Using custom sales invoice templates in Xero lets businesses create personalised invoices with their logo, colours, layout, and payment details. This makes invoices look professional, tailored and consistent and shows your customers how and when to pay, making the invoicing process easier and more efficient.

How to Set Up Custom Invoices in Xero:
Step 1
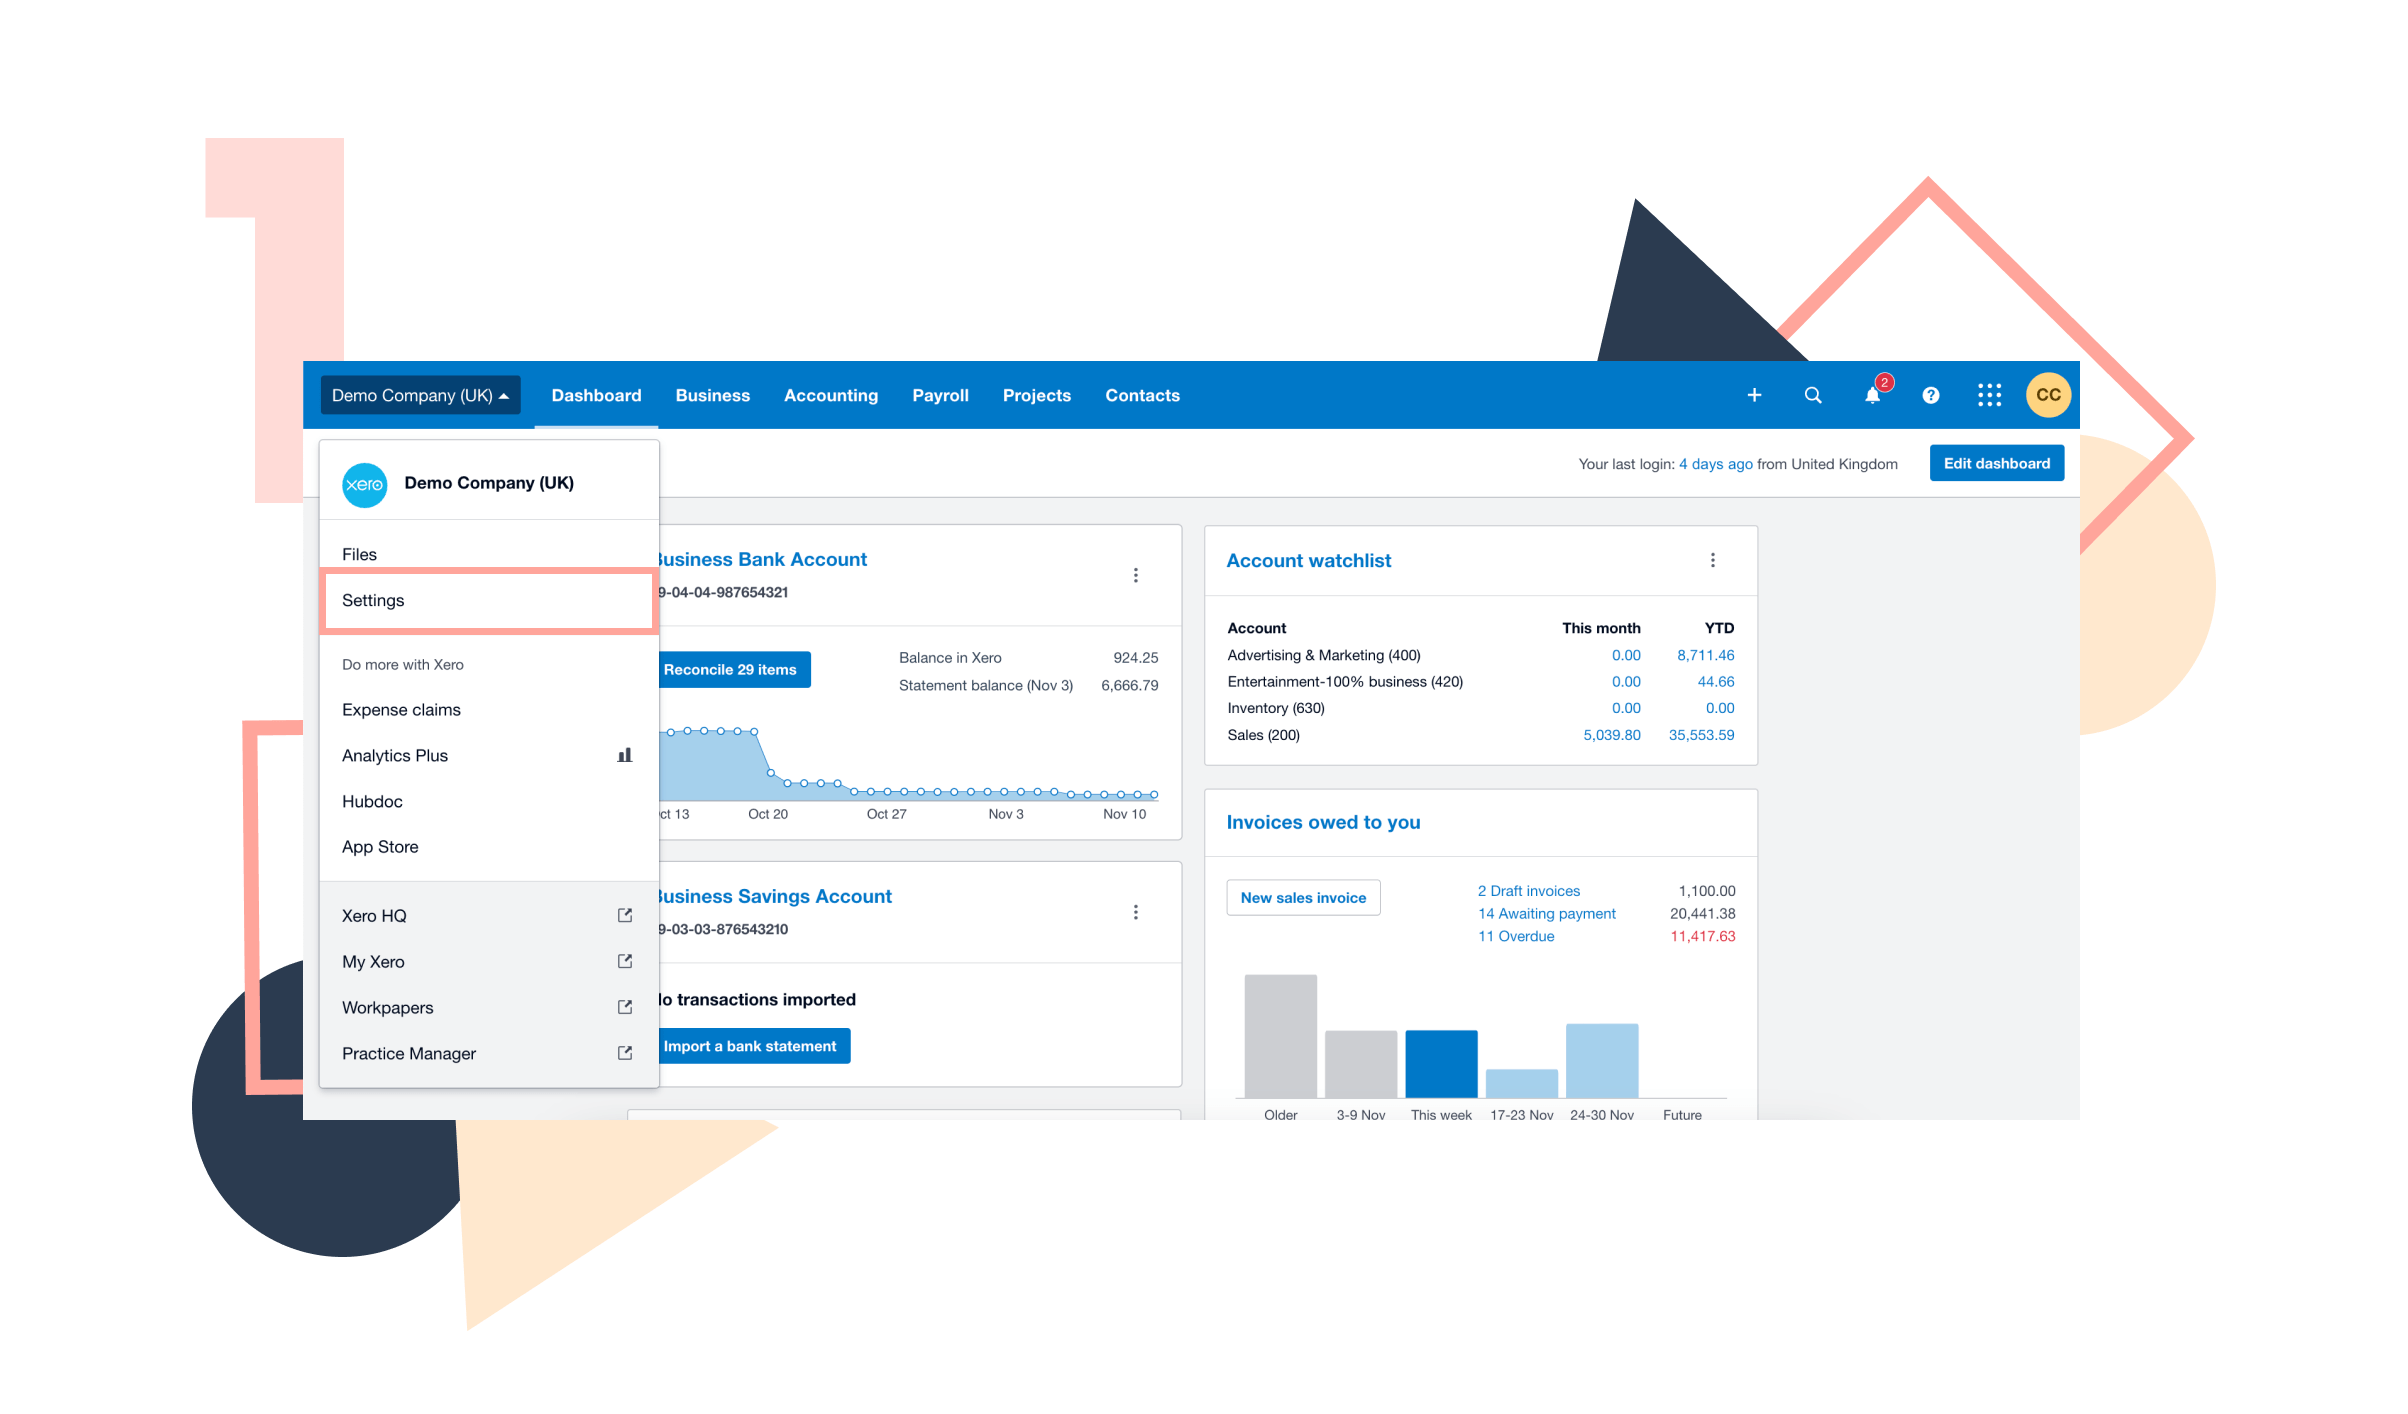
- Log into Xero
- Go to Settings
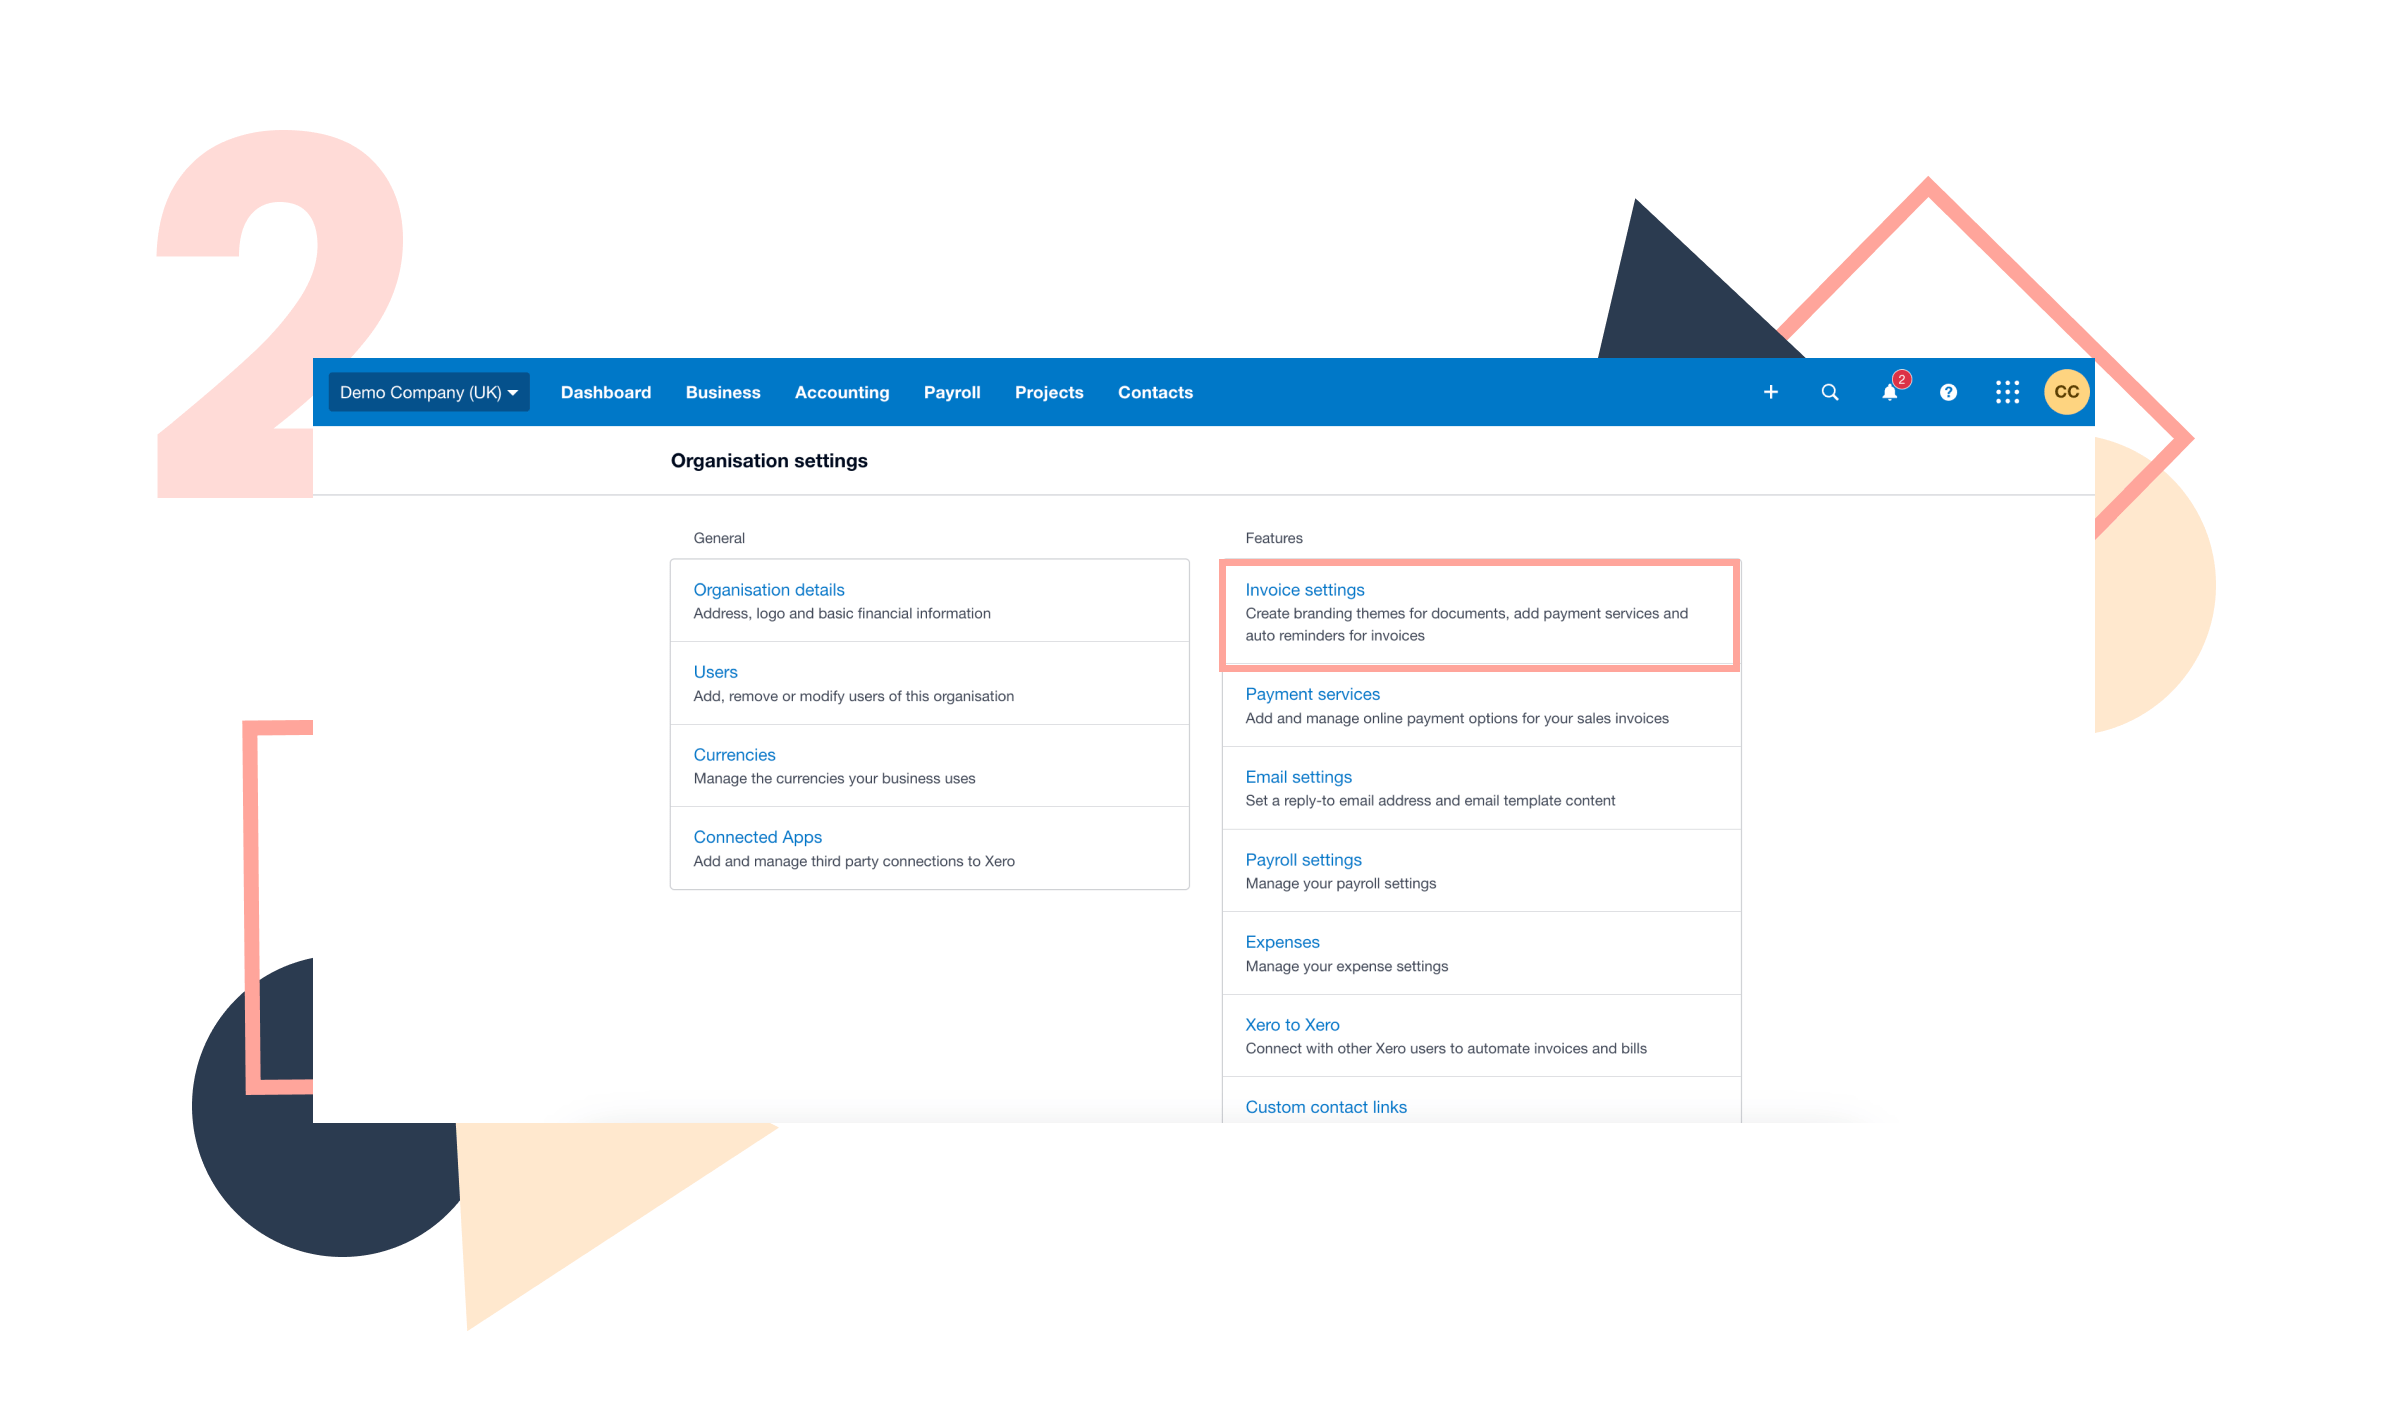
Step 2: Access Invoice Settings
- Click on the “Invoice Settings”
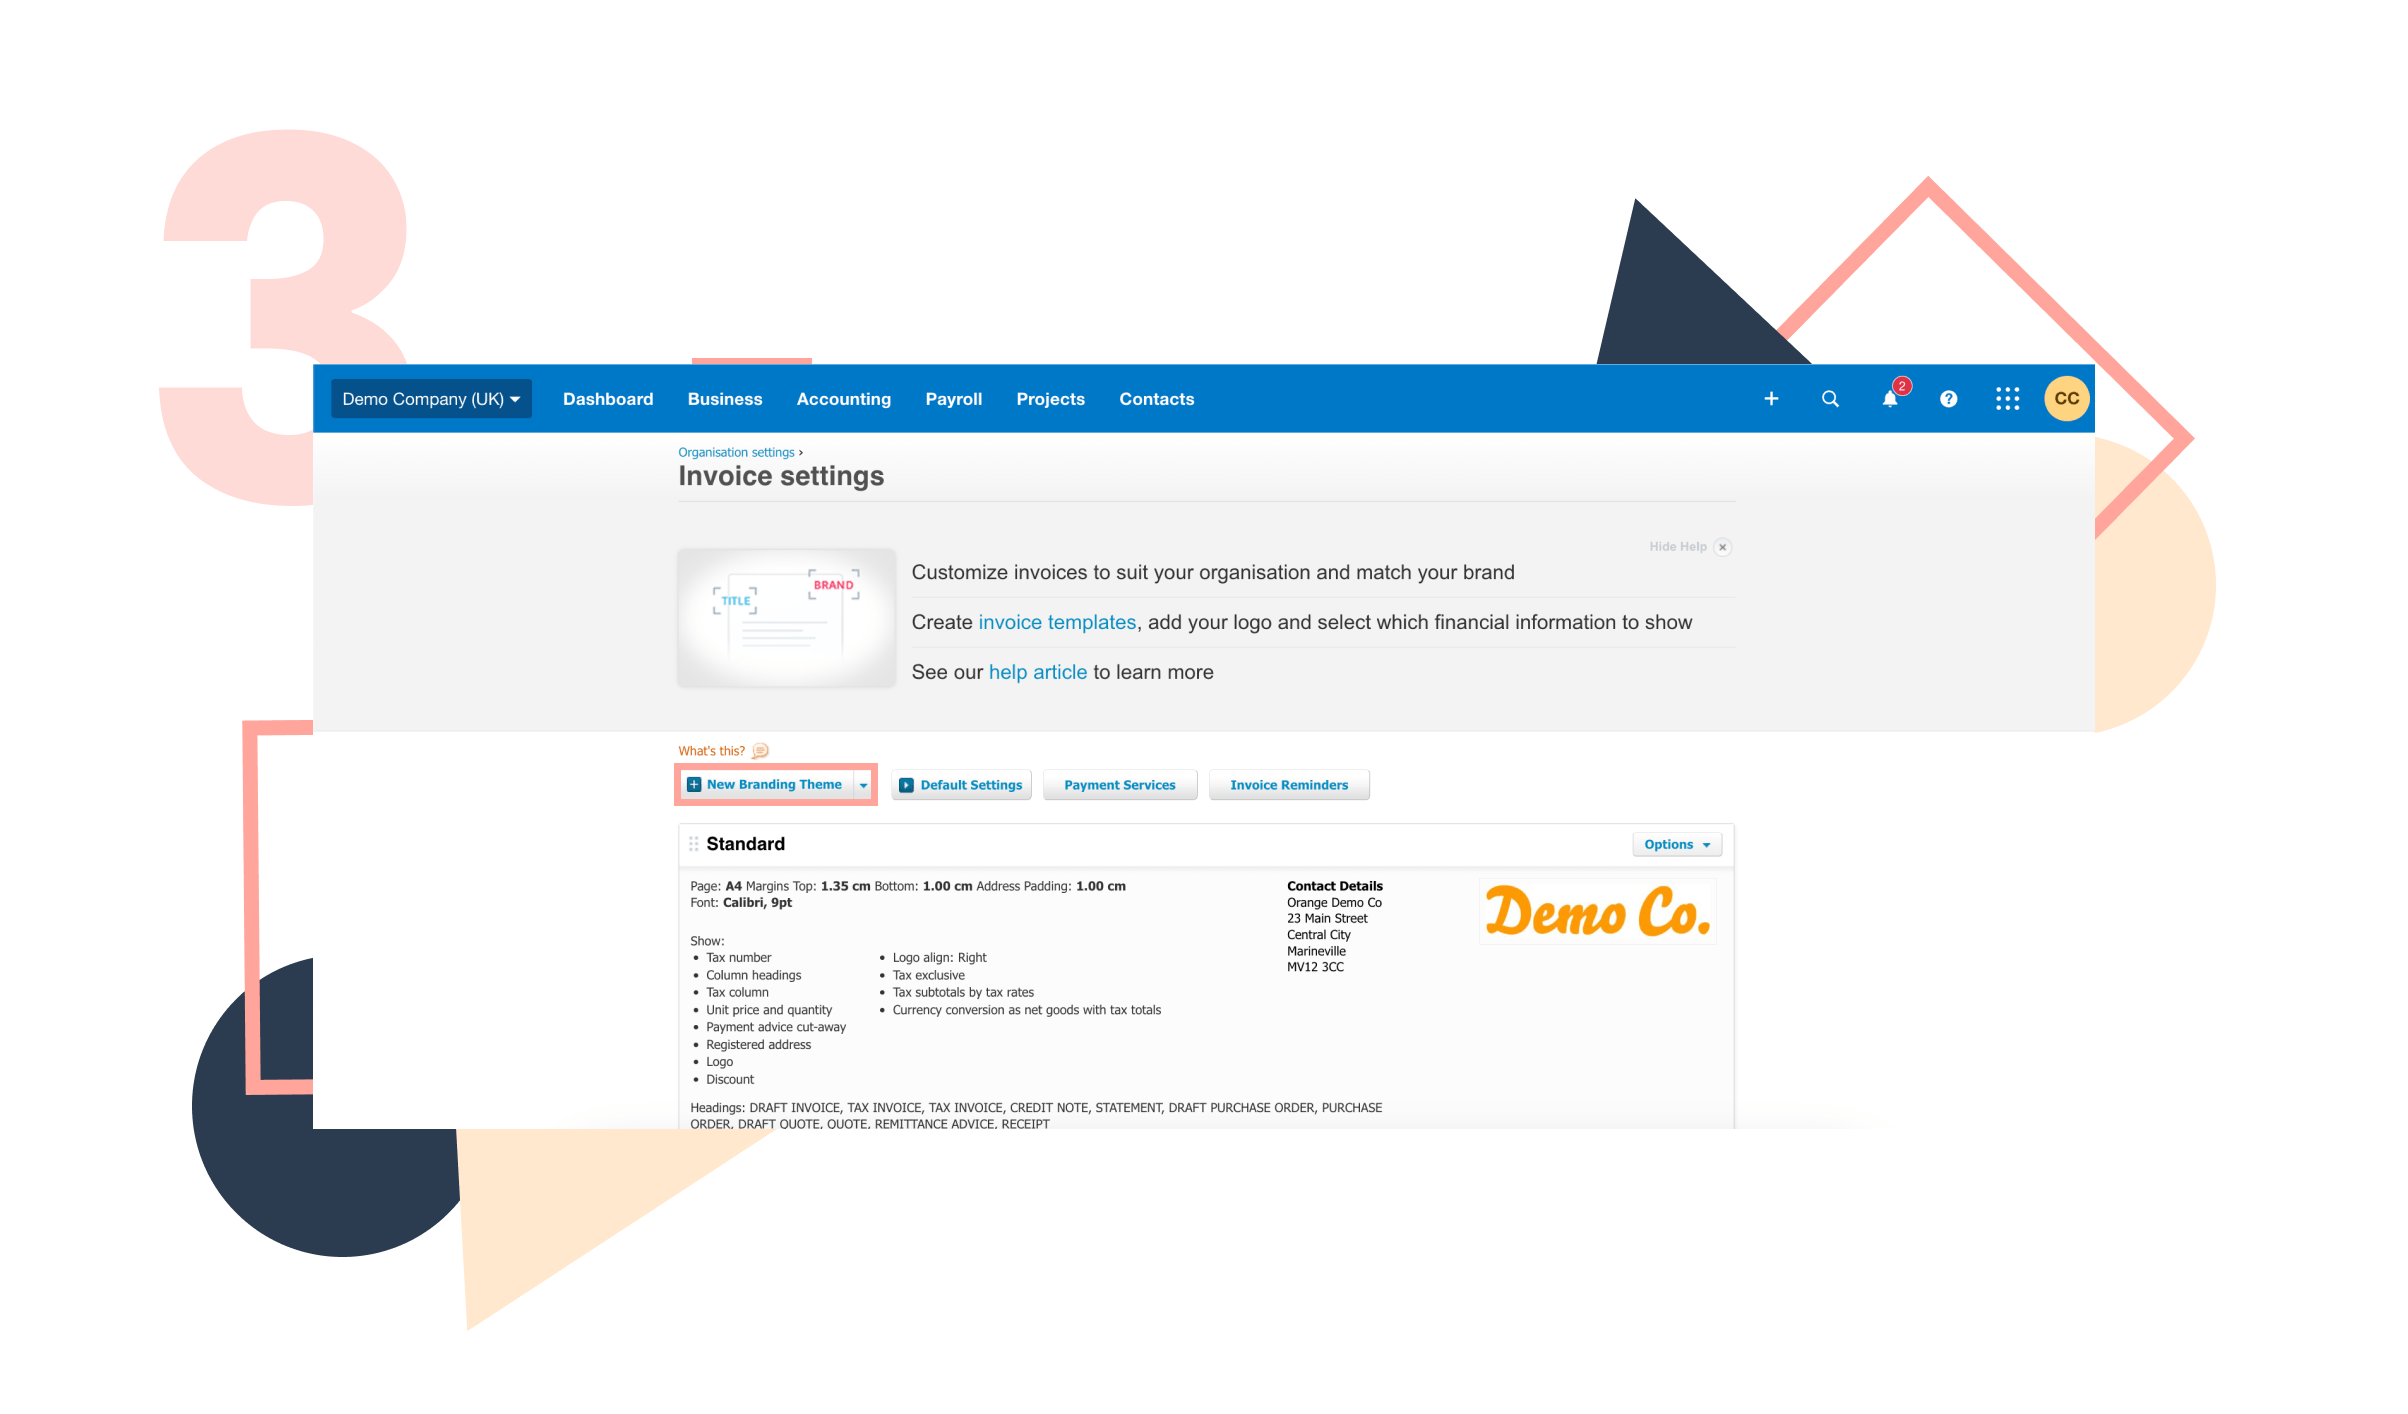
Step 3:
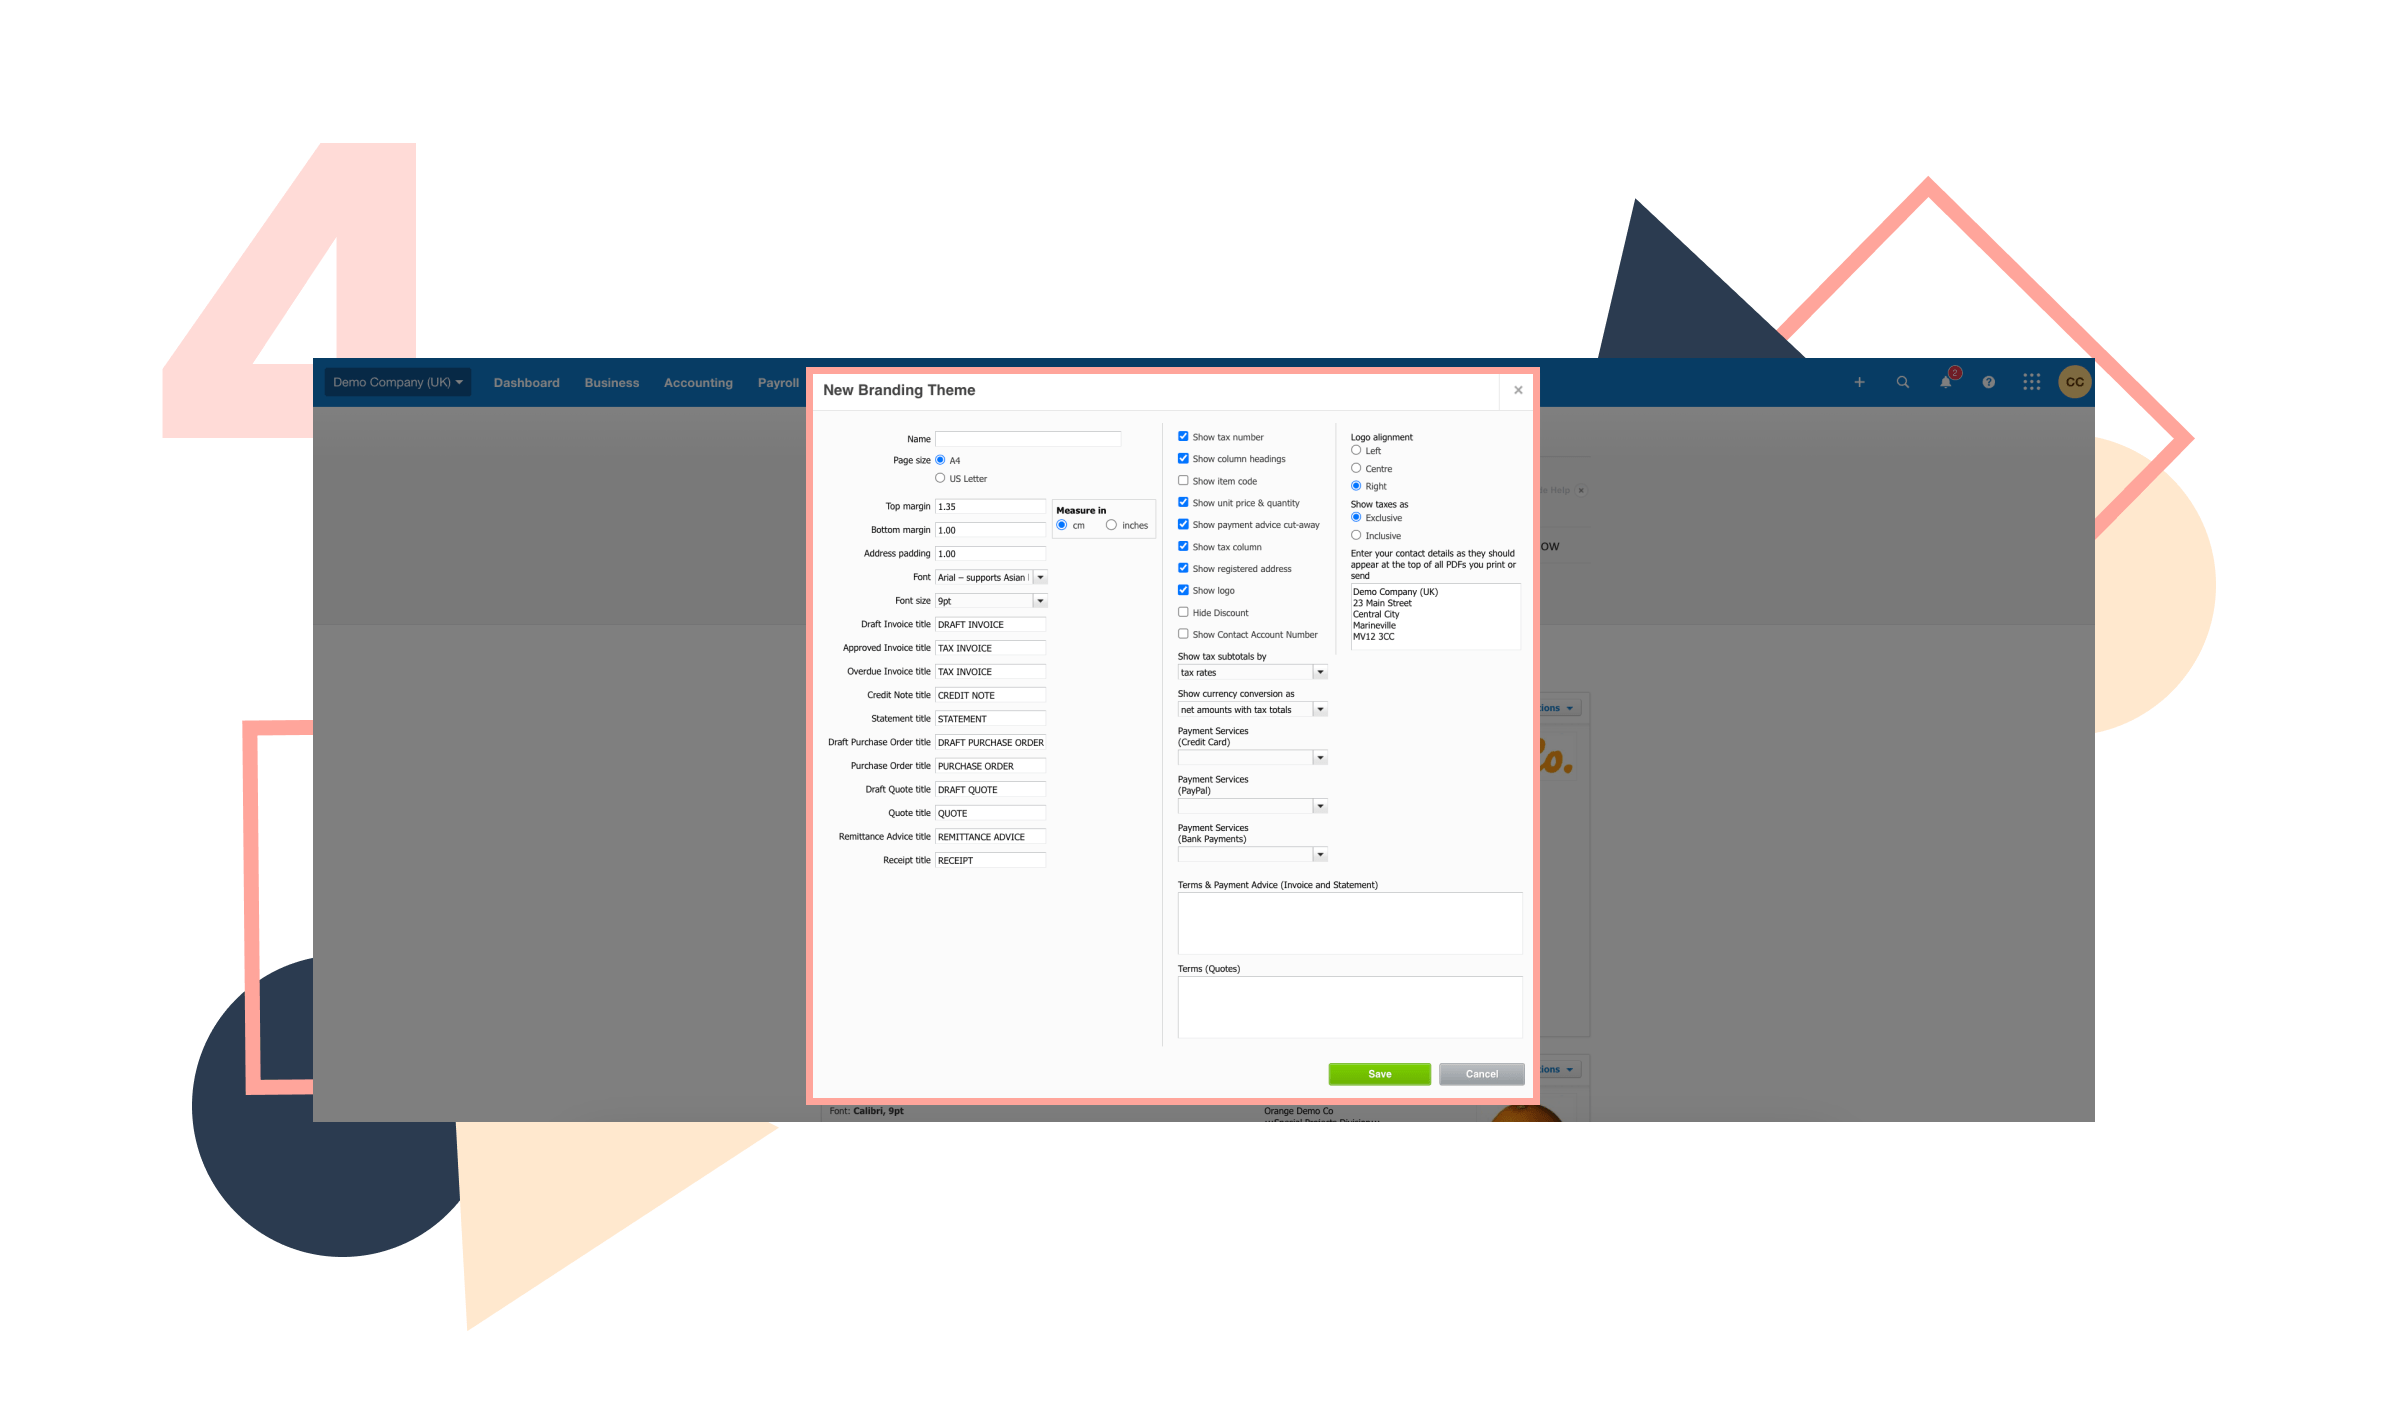
- Select “New Branding Theme”
Step 4: Update information that you want showing on your invoices
Branding Options
- Choose page size
- Define margins on invoice
- Select font style
- Customise document titles (e.g., “Sales Invoice” instead of Tax Invoice)
Set Up VAT Settings
- Ensure correct VAT rates are displayed
- Choose VAT inclusive/exclusive display
Payment Information
- UK bank account details
- Sort code and account number
- BACS payment references
- Include any specific payment terms
- If you have set up payment services (link to previous article) select which payment service you require on this invoice
Add Payment Terms & Other relevant information
- Due date (e.g., 30 days)
- Early payment discounts
- Late payment terms (referring to UK Late Payment Legislation)
- Include statutory right to claim interest and compensation
- Add notes about reverse charge VAT if relevant to your industry
Header Details
- Your trading name
- Business address
- Contact information
- Website (optional)
Click “Save”
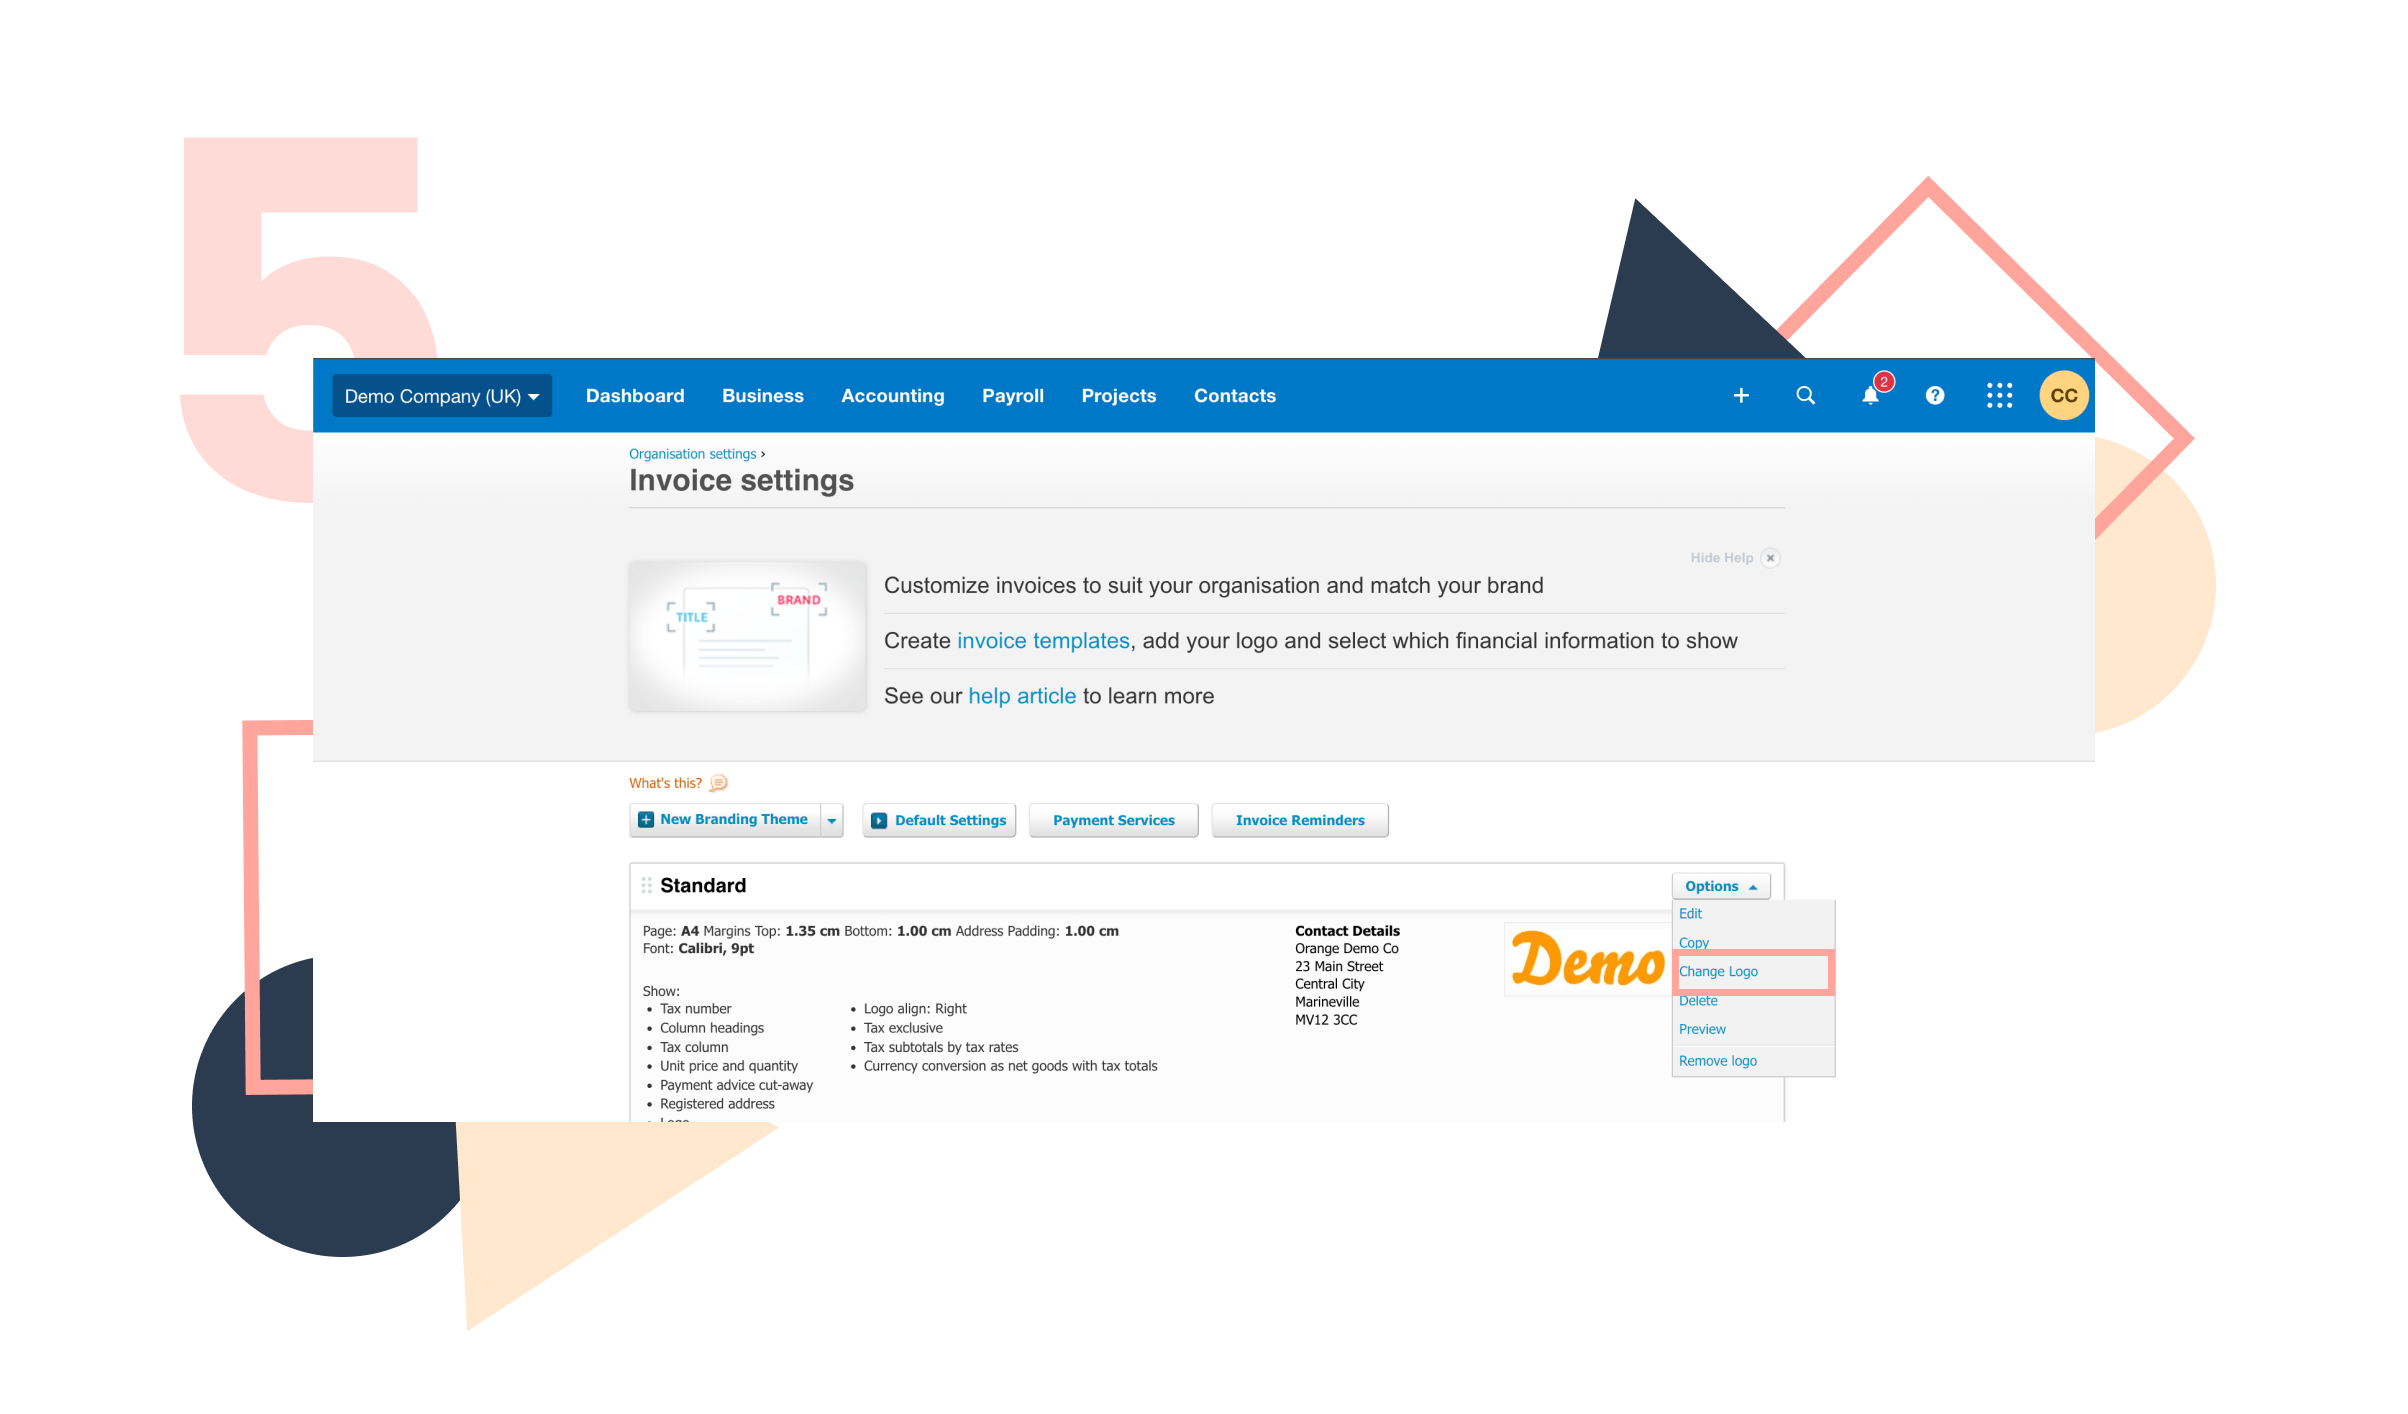
Step 5:
- Click “Options”
- Click “Upload logo”
- Recommended size: at least 300px wide
- File types: JPG, PNG, GIF
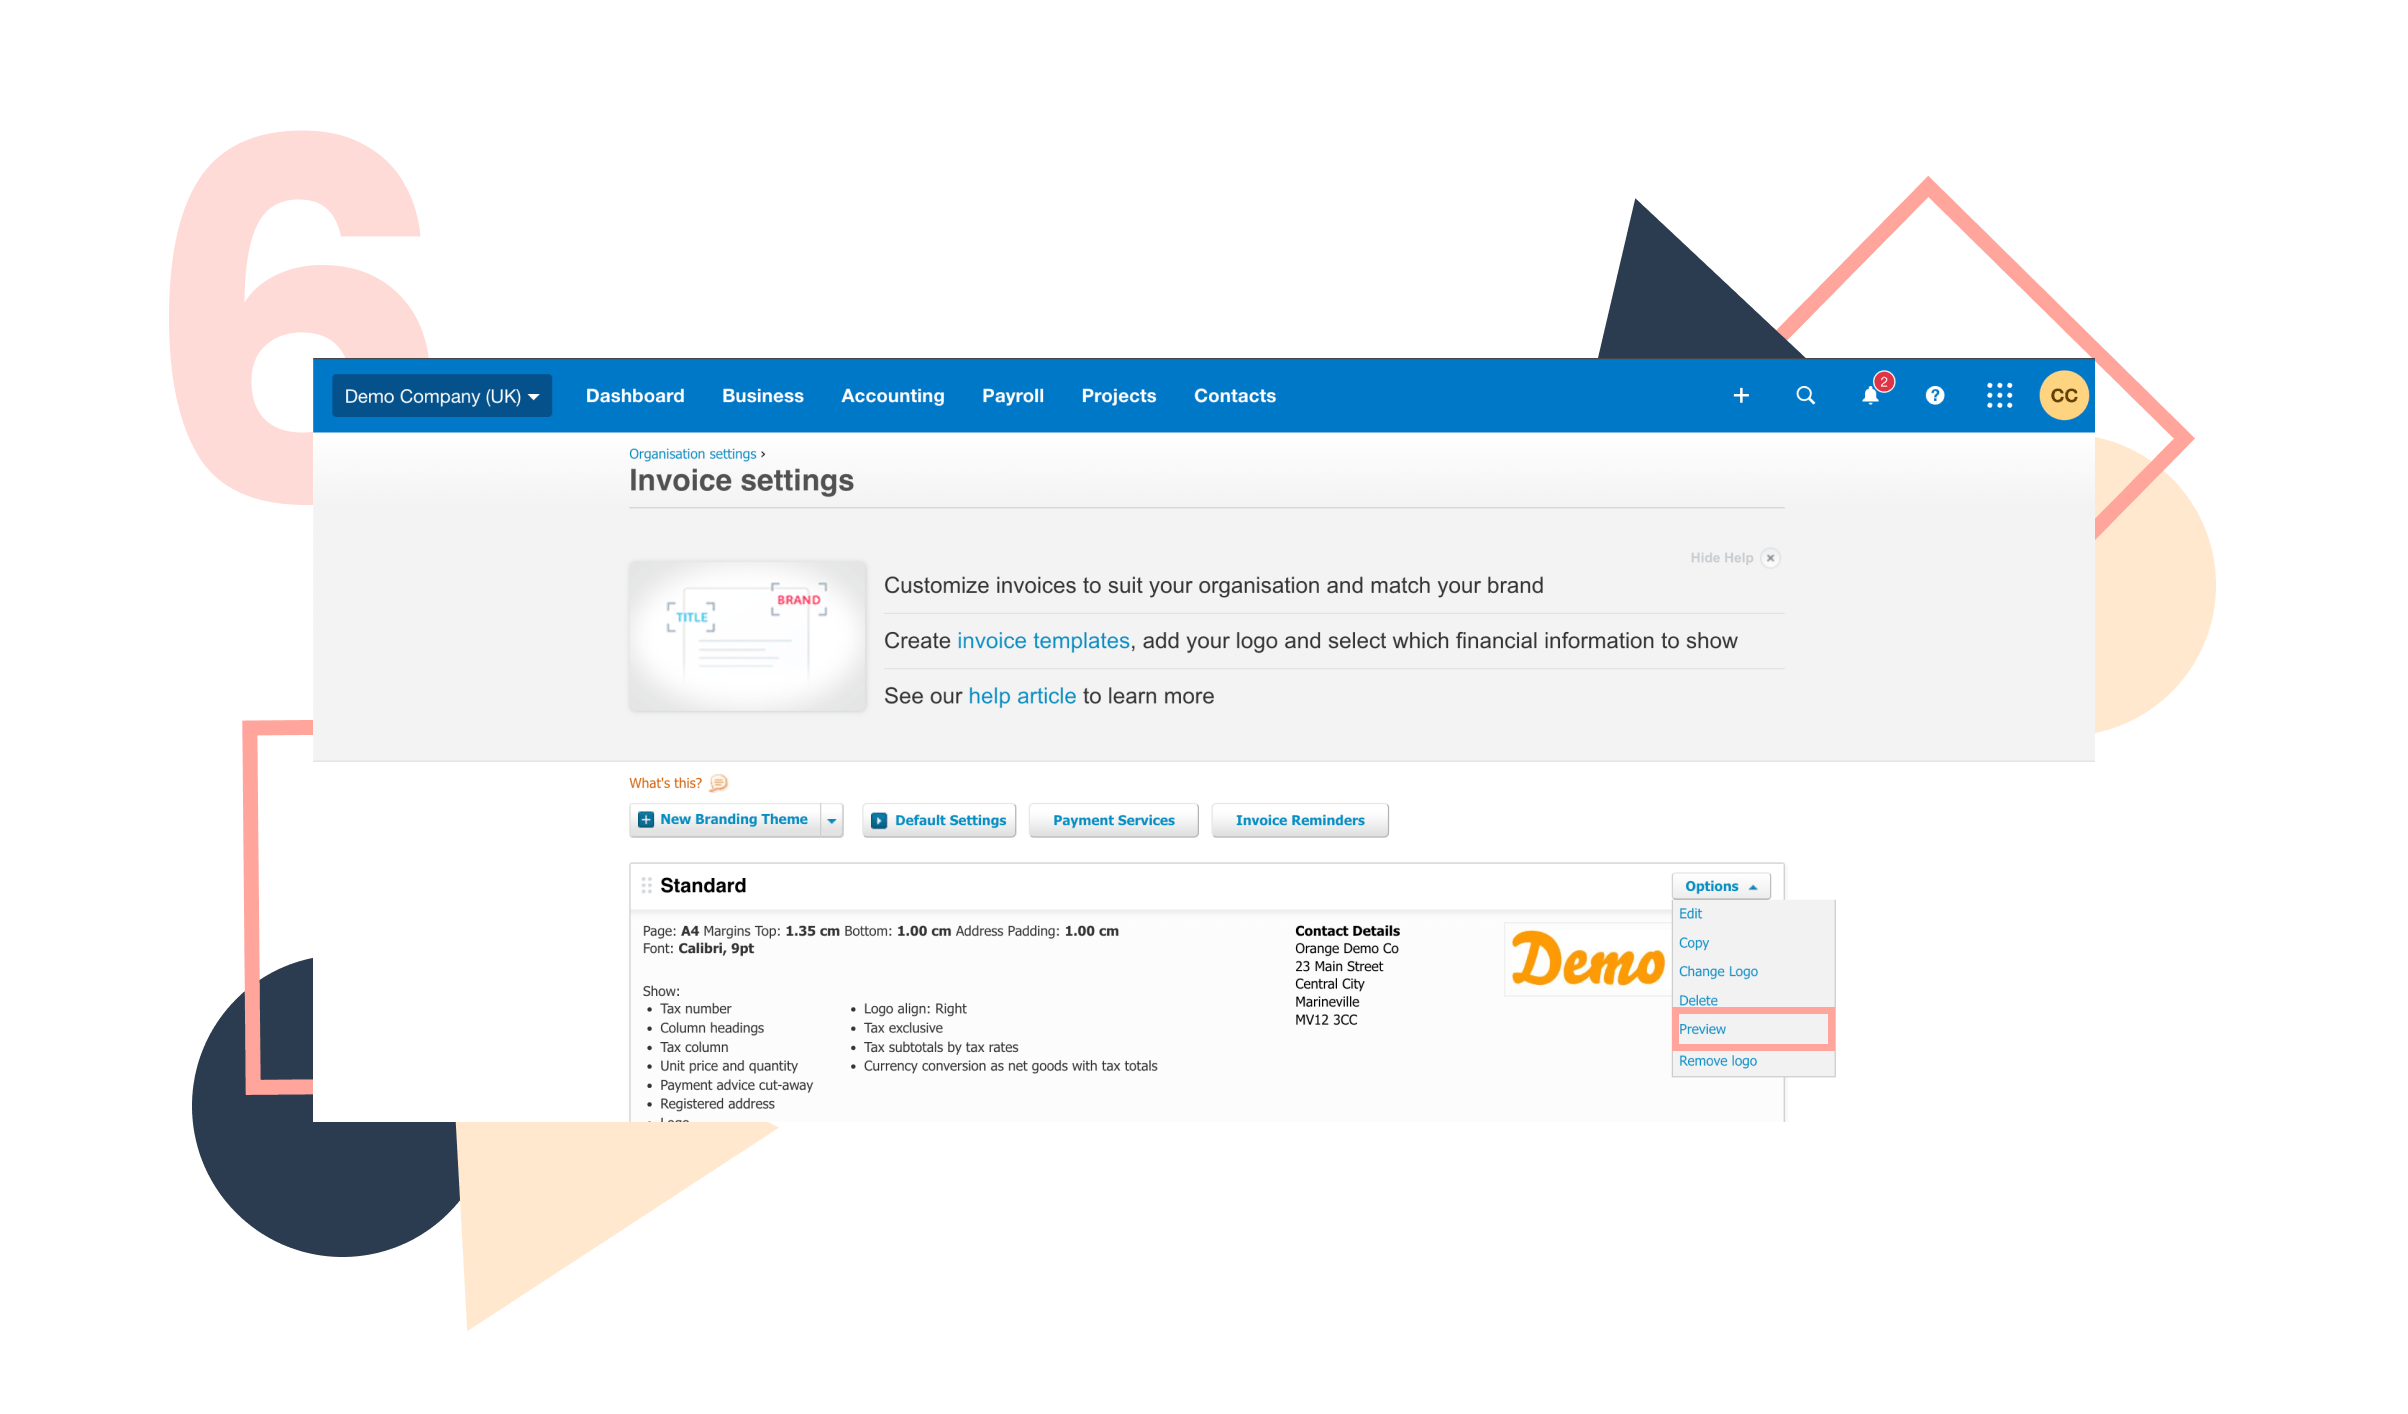
Step 6:
- Create test invoice
- Check all elements are present
- Verify VAT calculations
- Ensure compliance with UK invoice requirements
Required UK Business Information
- Company name as registered***
- Company registration number (if applicable)***
- Registered office address***
- VAT registration number (if VAT registered)***
*** Update the above in Organisational settings in Xero


